Example: Segment ID
Note
Test data are stored in /internal/data2/quip_data directory on wsslinux2. QUIP does not overwrite existing output files, so it is best if you copy the test data files to your own directory for testing. Otherwise, other people might run into permission issues or QUIP errors when they attempt to overwrite your output files from previous test runs.
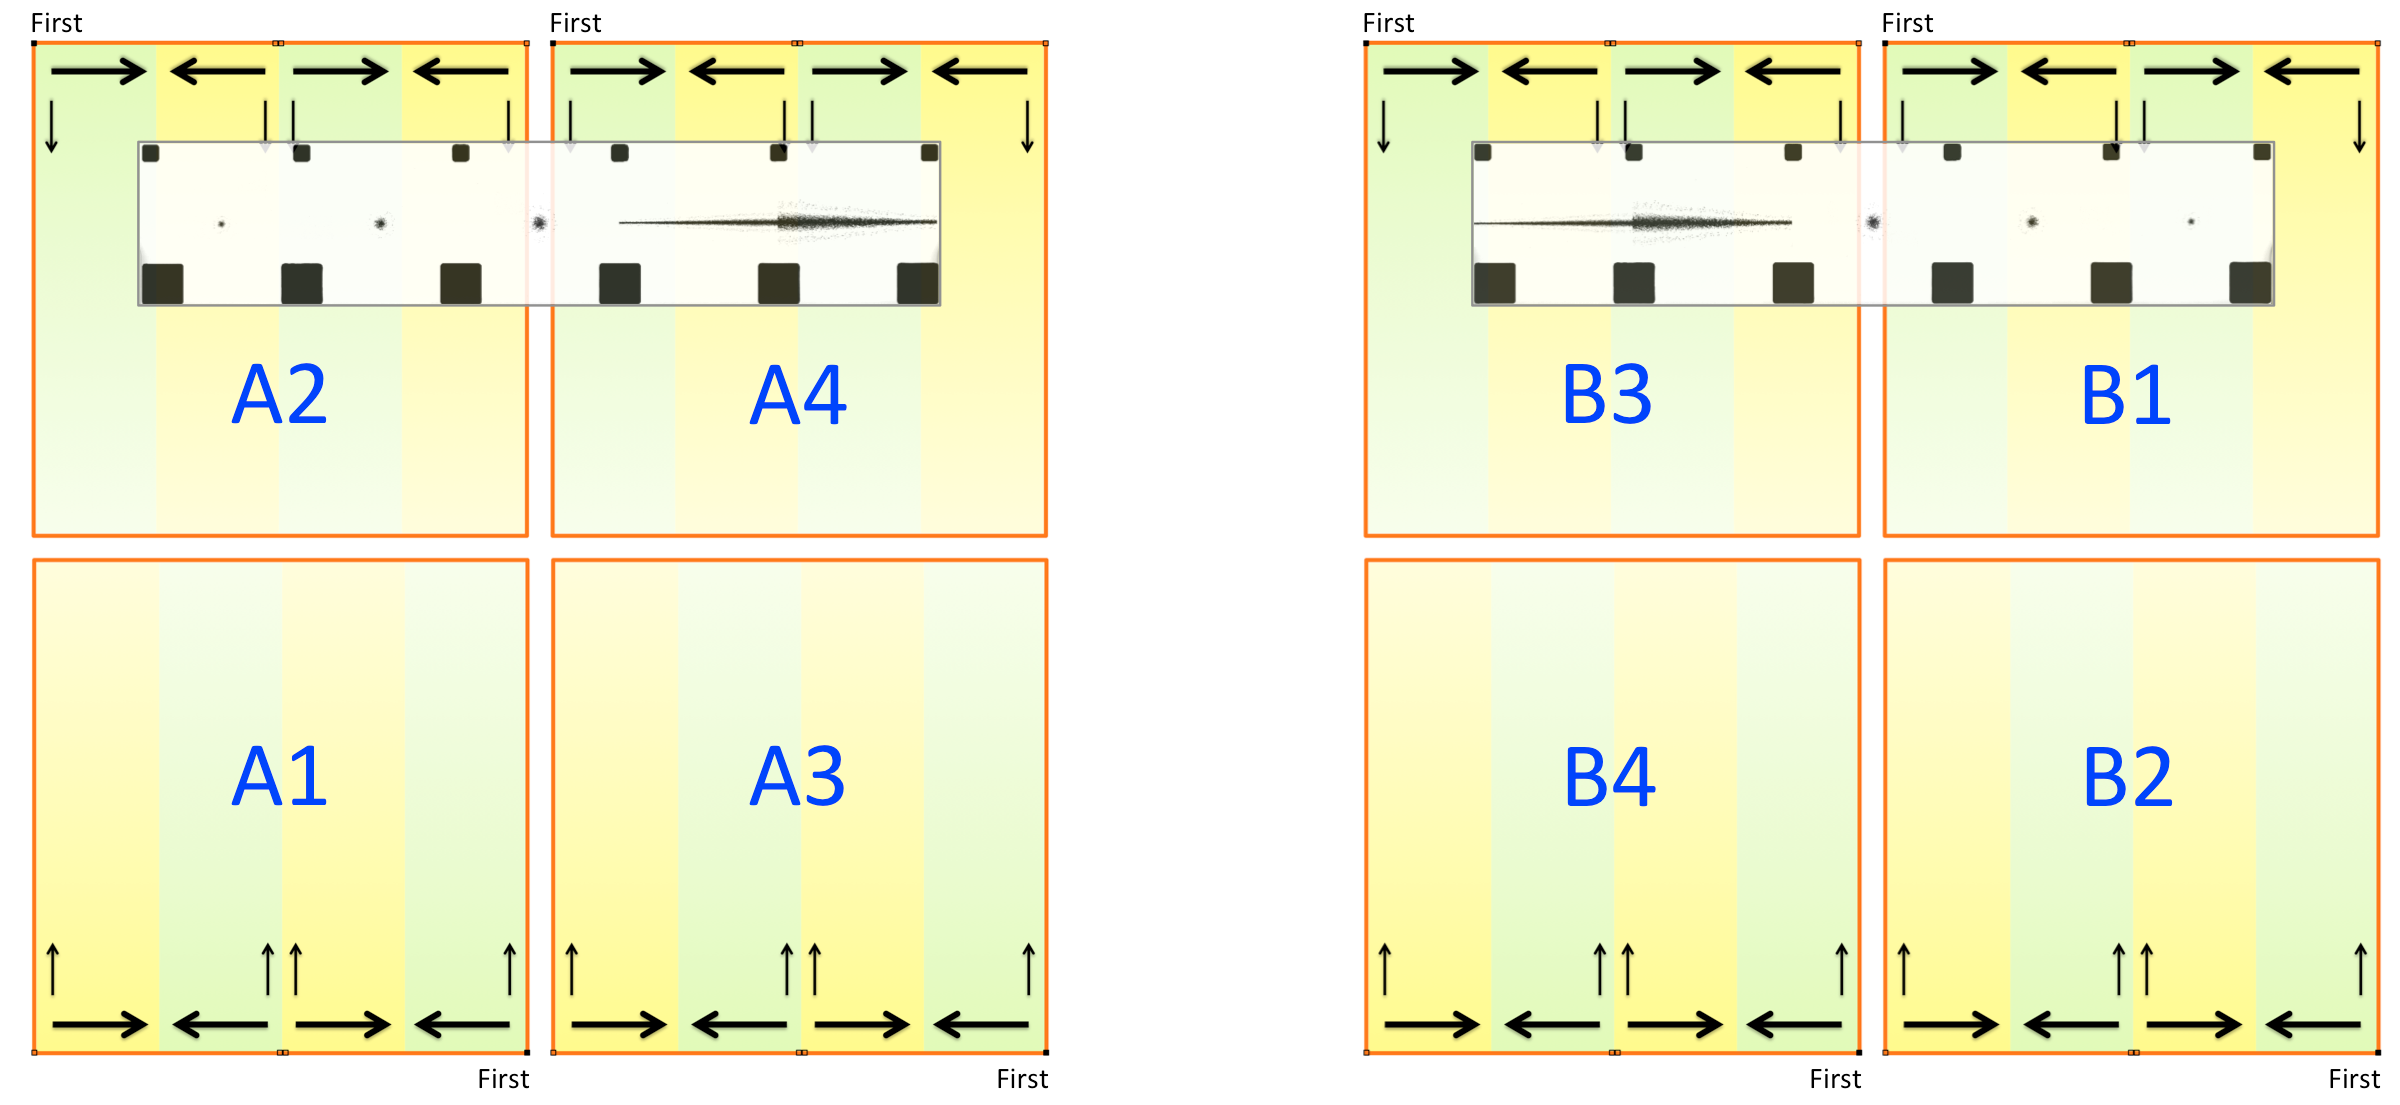
This example demonstrates a QUIP operation mode, SEGMENT_ID, that
specializes in displaying each NIRCam mosaic separately so they can be compared
by blinking on the display. As described by Marshall Perrin, “The user can
quickly page through the 19 NIRCam mosaics and see ‘OK, so this blob in SCA A2
changed position when we moved segment 10, and this other blob in SCA B4
changed position when we moved segment 12’.”
The mosaic uses thumbnails similar to Mosaic of Thumbnails but each mosaic only holds images from different detectors of the same exposure. All the input images are expected to advance to the next step in WEx; Therefore, QUIP will not produce any output files. To aid the blinking, Ginga’s auto-levels behavior is turned off.
Copy test data to your own directory:
$ cp -R /internal/data2/quip_data/segid_test /my/local/dir
Change directory to where your own test data are:
$ cd /my/local/dir/segid_test/inputs
Fix the paths in XML file:
$ sed 's/\/internal\/data2\/quip_data/\/my\/local\/dir/g' /internal/data2/quip_data/segid_test/inputs/operation_file_001.xml > operation_file_001.xml
Start QUIP (select optional arguments given in square brackets):
$ quip operation_file_001.xml [-g +300+150] [--nocopy] [--loglevel=10]
Behind the scenes, for each exposure, QUIP creates a scaled-down NIRCam mosaic
from all the detectors using NircamMosaic.
Each exposure is grouped by the same file prefix, assuming
standard JWST naming convention.
The scaling is set such that each NIRCam SW exposure is 100 pixels.
The mosaics are saved under a sub-directory named quipcache within
the same directory as the “QUIP Operation File”.
If mosaics already exist from a previous run, they are not regenerated.
Note
Unlike Mosaic of Thumbnails, the mosaics generated here do not have WCS, but this should not be an issue for this operation type.
Due to all the pre-processing above, Ginga might take a few seconds to start up. But when it does, you will see the mosaics displayed following this NIRCam layout:
To inspect the mosaics:
Blink them using the green up and down arrow icons (bottom left). Another option is to use the Blink local plugin. You can also use Thumbs or Contents global plugins by clicking on the desired image thumbnail or name.
If you need to rescale the display, click on Info tab on the left, enter “Cut Low/High” values, and press “Cut Levels”. Scaling is fixed for all images.
Exit QUIP by selecting “File” (top left) and then “Quit”.
Note that no XML or FITS file will be generated. This is because shortlisting and modification of images are not allowed in this mode.
A log file from Ginga (“ginga.log”) is written out to output directory given by the XML. It is overwritten if already exists because it is only useful for debugging Ginga. To see Ginga log file:
$ emacs /my/local/dir/segid_test/outputs/ginga.log